Friday, 26 April 2013

LAB 3 : PREPARATION AND STERILIZATION OF CULTURE MEDIA

Introduction :

To ensure having accurate and precise result,it is important for microbiologists to minimize the error due to external source such as air borne microorganisms.Although human body may look clean with naked eye,however,it is colonized by countless amount of microorganisms.Some microorganism is benefit to us while a minority is hazardous to human health.In moist area e.g:leg after wearing hours of stocking is an incubator for various smell-causing microorganism.In normal circumstances,our body is protected from those residential microorganisms by the mean of physical deffence and immune response.However,when the physical barrier is broken e.g:wound on skin,microorganisms are prone to causing local infection.Transient microorganism which is non-original resident are usually fail to become permanent resident in a new environment.This is due to they are not well adapted to the new environment compared with those local microorganism,hence they are outcompeted compared with those local resident.Thus,introduced microorganism normally only resides for a short time in new environment.Microorganism in upper repiratory tract are either normal residents or transients.As with the skin,the normal microflora largely consists of non-pathogenic or opportunistic pathogenic microorganism.As we breath,a considerable amount of transient microorganism are trapped.However,they are quickly eliminated via our body highly efficieint defense mechanism in no time.


Objective:
To prepare sterile nutrient agar for culturing microorganisms.

Materials and Reagents:
Commercial nutrient agar


Electonic balance


Distilled water and measuring cylinder

Scott bottles


Spoon


Weighing dishes


Methods and procedures:

1.The commercial nutrient agar and other nutrient powders were weighed by using analytical/electronic balance and then it was put into the beaker.


2.   250 ml of distilled water was measured by measuring cylinder.


3.The measured distilled water was added/poured into the beaker which contain nutrient powders.


4. The mixture of nutrient powder and distilled water were mixed/stirred by using glass rod.


5. The mixture was poured and added up in scott bottle.


6. The steriled water is prepared by using measuring clylinder to fill up 50ml of distilled water and then poured it into a scott bottle.

7. The scott bottles was labelled  as commercial nutrient medium or self prepared medium.


8.   Recap the bottles loosely and set aside for the sterilization.


9. Then, all media was sterilized at 121˚C for 15 minutes by using autoclave.


Discussion:

Culture medium is a synthetic medium which is filled with nutrients necessary to the growth of microorganisms or cells being cultured in the lab. The medium may be solidified by the addition of agar.

There are precautions that we need to take when we prepare the culture media. When we weighing the powder, the weighing area door opened as little as possible and one's hand could not be inserted into the weighing area when using analytical balance. We needed to clean the pan of the balance before using it to avoid the dirt from affecting our reading.  Besides that, we measured the volume of the distilled water by using measuring cylinder in order to get accurate reading of the water.  We did not pour all water into when mixing with the powder to let us to rinse the leftover powder with the water reserved. Distilled water was used instead of tap water to avoid the contamination of the culture media occur. We used glass rod to make sure the powder dissolved completely into the solution. We marked the Scott bottles according to the solution inside of them with marker pen to avoid confusion of the name.

We used autoclave to sterilize equipment and supplies by subjecting them to high pressure saturated steam at 121 °C for around 15–20 minutes. We had loosely recapped the bottles and set aside for sterilization to avoid the bottle from explode or suddenly opening the bottle would drop the pressure, causing the liquid inside to flash boil and spray out from happening. The drain screen was check at the bottom of the chamber before using the autoclave. Any debris was cleaned out. We needed to ensure the door was securely locked to enable a tight seal and avoid burns from the release of steam. The container was filled half full. When the autoclave cycle finished, we waited for the pressure gauge to drop to zero with zero time remaining before opening the door. The door was cautiously opened. We had to stand behind the door and slowly opened it and allow all steam to escape before reaching inside. We allowed the liquids stand another 10–20 minutes after the autoclave was opened to avoid any movement that could cause them to boil. The items were carefully removed. The cap of each Scott bottle was tightened. Finally, our media were successfully prepared. The media will be used for next laboratory.

Conclusion :

For culturing microorganisms, a sterilized nutrients agar is prepared. Culture medium is prepared with correct quantities of ingredients. Autoclaving, a process of sterilization by pressure and moist heat  to disinfect materials, is the most effective way of sterilization. The media is prepared successfully.

References :


Friday, 5 April 2013

LAB 2 : MEASUREMENT AND COUNTING OF CELLS USING MICROSCOPE


2.1 Ocular micrometer

Introduction
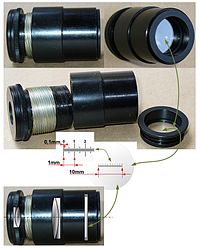
Ocular micrometer is a glass disk that fits in a microscope eyepiece and that has a ruled scale; when calibrated with a slide of micrometer and hence the direct measurements of a microscopic object on prokaryotic and eukaryotic microorganism can be made. It will not change size when the objectives are changed. Therefore, each objective lens must be calibrated separately.

Ocular micrometers have no units on them - they are like a ruler with lines but no numbers. In order to use it to measure microorganism under a microscope, you must assign numbers to the lines. This is done by looking through your ocular micrometer at a stage micrometer mounted on a slide. The stage micrometer is a ruler with fixed known distances, so you can use it to measure the size of the microorganism on the ocular micrometer. The lines on the ocular micrometer are different distances apart depending on the magnification used on the microscope. It must be calibrated for each objective of the microscope. Stage micrometer is vary but most of them contain a line 2mm long that subdivided into 0.01mm (10 µm).


Figure 1 Ocular micrometer
                                          

Objective
-To measure the cells using a microscope

Materials and Reagents
-Microscope fitted with an ocular micrometer
-Slide micrometer
-Stained preparation of Penicillium

Procedure
1.   The stage micrometer is placed on the stage.

Figure 2 Stage micrometer


2.  The superimposed image of stage micrometer and eyepiece scale is focused using the objective lens with lowest power which is 4x.


Figure 3 Microscope

3.  The number of divisions of the eyepiece scale correspond to a definite number of divisions on the stage scale are determined.

Figure 4 Ocular scale and stage micrometer scale


4.  The measurement of an eyepiece division in micrometer (µm) is calculated.
5.  The experiment is repeated by using the high power.
6.    Each division of the stage micrometer = 10 µm. If 100 eyepiece divisions = 11 stage divisions = 110µm, hence: 1 eyepiece division = 110/100 = 1.1µm
7.   The diameter of the field for each objective was calculated and recorded for future reference. 
8.  The sample cell’s average dimension in micrometer was determined.
  
Result
Total magnification = 40x objective X 10x eyepiece = 400x magnification  

Figure 5 Ocular micrometer and stage micrometer  under  400x magnification
                   
Discussion
1.   Ocular micrometer is a glass disc that fit in the microscope eyepiece that has ruled scale. It is used to measure the size of magnification object.
2.    Stage micrometer is a special glass slide with a known scale.
3.    Before we started to measure the size of microorganism, we spent some time to move the stage until the line of ocular micrometer is superimposed to stage micrometer. When the lines of micrometer are coincided, then we are able to measure the size of the microorganism.
4.    One division of stage micrometer = 0.01mm.
5.    For 400x magnification
     Stage scale = 0.01 mm
     Let x = 1division of the ocular micrometer
         3x =  8 division on stage micrometer x 0.01 mm
         3x =  0.08mm
           x =  0.0267mm

Therefore, one ocular division = 0.0267mm

Average dimension of sample Penicillium = 0.0267mm x 0.08 = 0.0213mm


Conclusion

Ocular micrometer let us measure the size of microorganism, Penicillium. Cells can be measured easily especially using oil immersion.


2.2 Neubauer Chamber

Introduction
To perform counting of cell accurately, Neubauer chamber is used which is analogous to the quadrat sampling. Neubauer chamber is a thick glass slide with two counting area separated by a H-shaped depression and it is 0.1mm deep(refer figure 1).A counting special cover slip which is having counting grid will set on the Neubauer chamber to allow calculation of the concentration of the cell.


Figure 1 Neubauer chamber

Materials and Reagents:
-Neubauer chamber and coverslip
-70% ethanol
-Pipette

Procedure
1.    Neubauer chamber was cleaned with 70% ethanol to remove any microorganism or unwanted debris and left it to dry.
2.    Neubauer chamber was placed and secured on the stage.
3.    The coverslip is placed carefully by 45 degree on the Neubauer chamber. 
4.    The microscope is focused until an image is formed.
5.    The diaphragm is set to smaller to increase image contrast. 


                        Figure 2 The grid layout observed through microscope of the Neubauer chamber
    
Discussion
Neubauer chamber consists of finely etched lines that crossing each other perpendicularly which creates a counting grid which aids us in counting the cell. The grid is been seen through 400x of magnification. The grid is divided into 9 large squares. Each square has a surface of  area of 1 mm2 and the depth of the chamber is 0.1 mm. Therefore, the volume is 0.9 mm3   There are 16 small squares in a large square. We also have to avoid the present of bubble in the slide of the specimen when we view the grid.

Conclusion   
In this experiment, we have learnt to setup the Neubauer chamber and the method of calculating the number of cells.